Navbar

Image Map
Showing posts with label crockpot. Show all posts

Friday, November 15, 2013

Crockpot Hot Pot Chicken

I have been excited for this recipe for awhile now. It exceeded my greatest expectations; honestly, this was the best chicken I have ever cooked.

Quick backstory: Bear and I eat Chinese hot pot quite frequently with our friends R. and S.  S. is from Beijing, and introduced us to hot pot at a restaurant in Midtown a few years ago. We were instantly hooked and often meet up with them and other friends to share a hot pot.

R. and S. have recently settled into a beautiful, huge apartment in Brooklyn and invite us over fairly frequently for S.'s awesomely delicious, homemade hot pot. Hot pot is all about the seasoned broth -- she prepares her broth in a neat pot with a divider. On one side is mild, delicious pork broth.  On the other side, hot and spicy broth. The last time we went, S. gave me a packet of the seasoning she uses for the spicy broth side of the hot pot, and I have been itching to use it ever since.


(The price for this on Amazon is, frankly, shocking to me, because S. picks up packets of the same spice mix at a Chinese grocery store for $1.99 each!)

I figured I would marry two of my culinary loves -- hot pot and the crockpot -- into one delicious hodgepodge.

Crockpot Hot Pot Chicken

  • 1 three-pound to five-pound roasting chicken (basically a chicken big enough to fit nicely in your crockpot and still be able to close the lid)
  • 1/2 packet Baijia hot pot seasoning (Note: this stuff is STRONG and SPICY.  I only used half of a packet for the entire chicken and that was perfectly enough.)
  • 1 large onion
  • olive oil to grease crock pot base
1.) Cut the onion into pieces and layer on bottom of greased crockpot base. This is a protective layer to keep chicken skin from burning into the ceramic base and keep juices circulating as the chicken slow cooks.


2.) Remove giblets from chicken's body cavity and cut off any excess skin (if necessary). However, I decided to just put the giblets into the crockpot. I LOVE chicken neck and liver and figured they would taste incredible in the seasoning too. I was right.

3.) Rub down chicken with hot pot seasoning, careful to make sure some seasoning is applied inside the body cavity and also in every nook and cranny of the chicken.


4.) Place the chicken breast side up in the crockpot on top of the onion protective layer.


...and that's it! Preparation time was only 10 minutes. I covered up the chicken and put it in the fridge. The next morning I took the seasoned chicken out of the refridgerator and plugged in my crockpot on the "Low" setting.

I came home 8 hours later to this lovely smelling bird:


We served our juicy hot pot chicken over fresh riced cauliflower, sauteed in a little bit of butter and garlic. Yes, actually fresh (not frozen) cauliflower. It only took about 15 minutes to get the right consistency. Maybe I am getting less lazy!


This was one of the best meals of my year. Seriously. And it was so incredibly simple -- it took 10 minutes to prepare and was ready when I got home from work! You really can't beat that.

As soon as we pick our hot pot birdy clean, I am going to boil down the carcass into some nice spicy chicken stock using (of course!) the crockpot. Maybe I'll use the stock to make some of that jambalaya Eleni recommended!

Enjoy and let us know what you think.

-Alex

P.S.

Some of you out there, like Eleni, may not like spicy food. You can still make this recipe using mild hot pot soup base. Just as flavorful, but less piquant.

See:


Again, if you have a Chinese grocery store nearby, you're better off getting your packets there -- they are much cheaper!

Thursday, November 14, 2013

Easy (low-carb/keto) Crockpot Meatballs

I love to use the crockpot in the wintertime! So here's another crockpot recipe. Fair warning: there's probably going to be a lot of crockpot-centric recipes posted here in the next few months.  


We made these delicious meatballs yesterday, and they are now all gone. This is totally on Bear, by the way. I only got to eat, like, 4 of them. Very quick to prepare (and eat!)

Easy Crockpot Meatballs
  • 1 1/2 to 2 pounds ground beef
  • 1 medium onion
  • 4 cloves garlic
  • 2 large eggs
  • 1 tablespoon almond flour (a substitute for traditional breadcrumbs)
  • spices to your taste -- I (of course) used a bit of cayenne pepper, some salt and pepper, and a dash of steak rub.  If I had had some oregano, I think that would have been nice.
  • enough olive oil for browning in pan and to grease crockpot
1.) Mince garlic and roughly chop up onion.

2.) Mix vegetables with all other ingredients in large mixing bowl, until meat is not texturized any longer and is "sticky" to touch.

 
3.) Roll meat into balls of your choice size.  Mine were about 1 1/2 inch or so diameter. You can do little mini-balls or big oval sized keftedes (Greek meatballs). I use my hands, but you can use a meat-baller if you like. Eleni HATES touching meat, so this is something she could use:


4.) Lightly brown meatballs on medium-high heat on olive oil greased pan (this took me two rounds to do with about 1.6 pounds of meat).


Blurry balls!
5.) Transfer your meatballs to the greased crockpot. 


All the balls should lie flat in the base of the crockpot.


From there it's just plug and play! I put these in the fridge overnight, then cooked these on "Low" for about 7 hours, starting when I left for work in the morning the next day. They are hearty and tasty (and now completely gone). You can eat them as is, or dress them up with various sauces or sides.


We took the lazy route (as always!), and I cooked a bag of chopped, frozen broccoli cuts in a jar of alfredo sauce. Then we melted some mozzarella over the whole shebang.

YUM!
This recipe was quick, easy, ready when I got home from work, super filling, and--of course-- low-carb/keto friendly.

The only problem is that Bear eats it all so fast!

Enjoy and see you next time. As always, we'd love your comments and suggestions.

-Alex

Wednesday, November 13, 2013

Eleni's Hump Day Recipe - Keto Breakfast Casserole

I have been doing a lot of cooking lately. I want to share some photos and recipes.

First is the AMAZING Jambalaya I made the other night. It is a slow cooker recipe, which makes me love it even more because I can throw it all in at the beginning of the day and it is done by dinner time. As delicious as this was, I cannot take credit for the recipe. I found it while browsing Pinterest. The original link is here.

Since we are a keto household, we did not use rice. I also did not add the cayenne pepper (I personally HATE spicy food) or Tabasco sauce (we didn't have any). It turned out great, though! I could barely wait for Hubster to get home so we could eat it. T-Rex enjoyed it, too! Especially the sausage.


Look at my pretty slow cooker! Functional and appealing to the eye! What could be better? 


I know what could be better! Breakfast for dinner! Which brings me to the second recipe: Keto Breakfast Casserole. Although I made this fresh for dinner, this is another recipe that you could prep ahead of time and just toss into the oven when you are ready. 

Keto Breakfast Casserole 
  • A medium head of cauliflower, chopped or "riced" (this will be the potatoes or hash in a normal casserole. If you do not do low-carb, you could do hash here instead)
  • 1/2 stick unsalted butter, cut into slices
  • 1 lb. pork sausage 
  • Two large handfuls fresh spinach (or about 1 cup of frozen spinach, depending on what you have on hand) 
  • 8 eggs, beaten 
  • 1 block cheese, shredded (we used cheddar, but colby jack is another fav. Use whatever you like) 
  • Salt, pepper, garlic powder to taste. 
1.) Preheat oven to 400 degrees Fahrenheit. Put cauliflower into 9x13 pan and cover with slices of butter. Season well.

2.) Place pan into oven and cook for 15 minutes.

  
3.) In a large skillet, brown and crumble the sausage. Once fully cooked, add spinach and cook until slightly wilted and a deep green color. While cooking, season well.
 
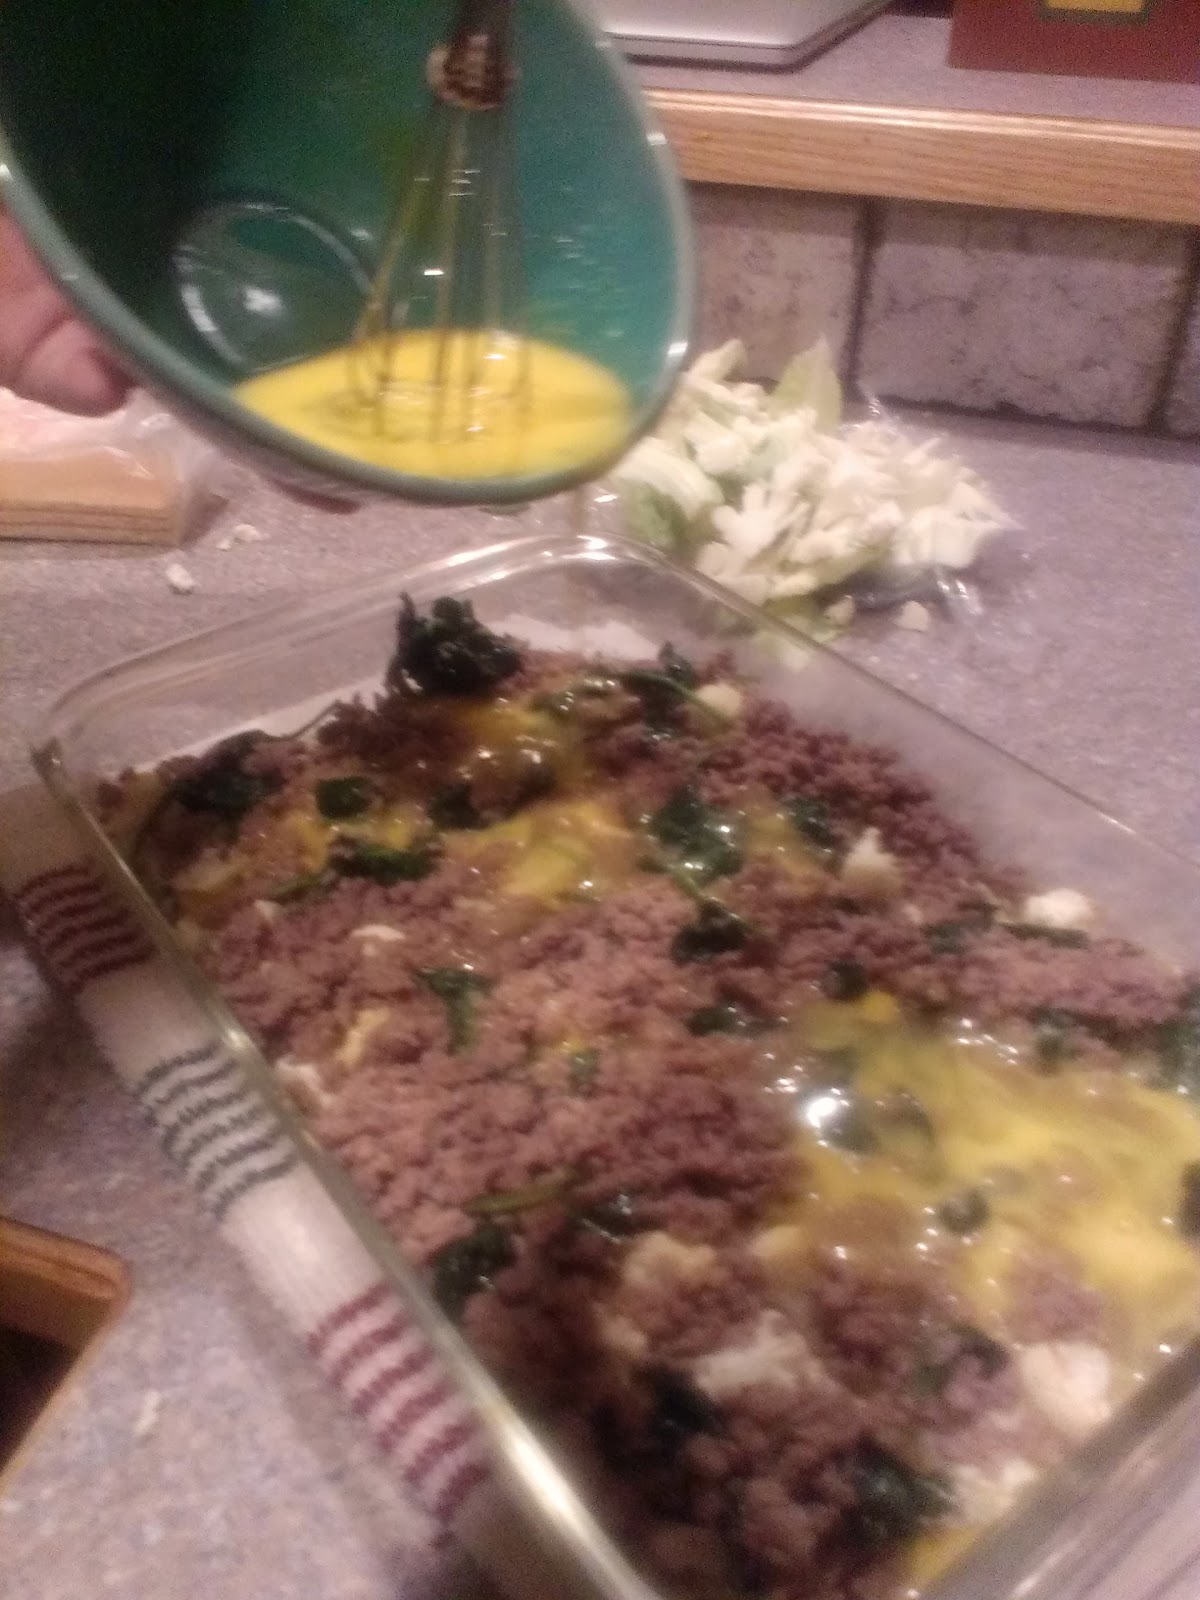
4.) Once cauliflower has cooked, remove pan and add sausage mixture on top of cauliflower. Next, evenly pour eggs over top of sausage. Cover casserole with shredded cheese. (Picture may not show even pouring. Hubster decided he wanted to help...)


5.) Bake casserole for 20 minutes. Remove, let cool about 5 minutes, and enjoy!


This was something I whipped up with what we had on hand. It turned out great! We all had multiple helpings, and the left-overs reheated well for lunch the next day. I hope you enjoy it as much as we did! Until next time. 

Φιλάκια, 
Eleni

Monday, November 11, 2013

Lazy person's quick and easy Winter Low-Carb Beef Stew

It's getting cold out and the shorter sunlight hours are wreaking havoc with my regular habits. By the time I get home from work -- after trudging down the hill from the subway station in the dark -- I just want to eat something, do an errand or two, and SLEEP.

To that end, I've been trying to prepare food early in the week that will be ready when I get home. Because I'm basically pathologically lazy. I prepared this recipe last night. I'm looking forward to eating this hearty stew when I get home tonight (and probably for the rest of the week!).

Winter Low-Carb Beef Stew
  • 1 1/2 - 2 pounds cubed beef stew meat
  • 8 large "button shaped" portabella mushrooms
  • 1 bunch celery hearts
  • 1 small zucchini
  • 1 large onion
  • 6 cloves garlic
  • 2 packets Goya beef boullion
  • 8 cups water
  • salt, pepper, cayenne pepper, garlic powder, cumin to taste


1.) Chop all vegetables into chunks and place in crockpot.


2.) Sprinkle boullion on top of vegetables.  
                 

3.) Using kitchen scissors (my favorite cooking implement!), cut the stew meat into chunks.  Remember, the beef will shrink as it cooks, so you don't want to make the chunks too small.


4.) Add water and spices and stir well. (You might be asking of the below photo -- where's the beef? Well, before the stew is cooked completely, the vegetables float and the meat sinks in the water!)


This whole process literally took 15 minutes. After I assembled the stew, I just put the lid on my crockpot and put it in the fridge.  Note: my crockpot base separates from the ceramic bowl, so I don't have to put the part of my crockpot that plugs into the wall into the refridgerator!


This morning before work, I took the stew out of the fridge, put the ceramic bowl ino the crockpot base, plugged it in and turned the dial to "Low."  When I come home (about 9 hours or so later), baby, I'll have a stew going!

I'll post pictures of the final product tomorrow.  [Edit- here it is!  Hearty, meaty and filling. The mushrooms are especially savory. I'm having leftovers for lunch today!]


I make this recipe fairly frequently in the winter.  It tastes better on the 3rd or 4th day, too!

Enjoy and stay warm!

-Alex