Navbar

Image Map
Showing posts with label holidays. Show all posts

Sunday, January 4, 2015

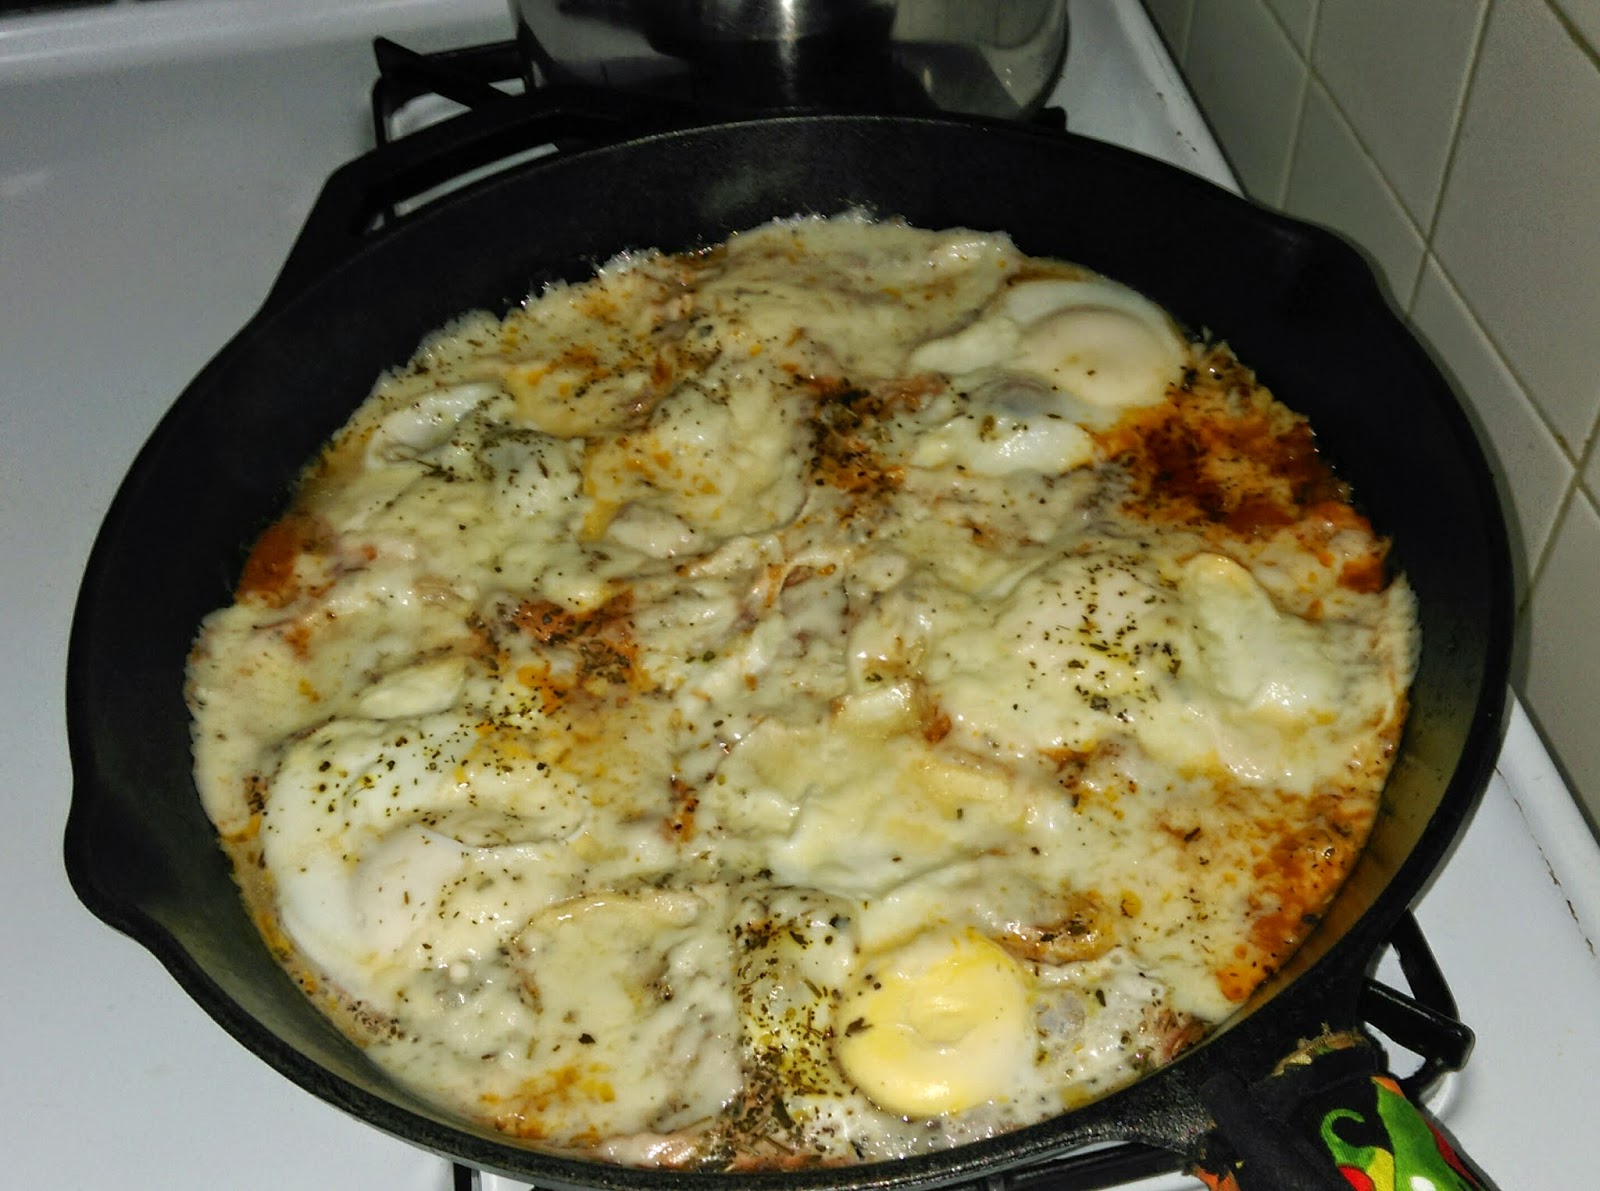
Happy New Year 2015! Enjoy some Spicy Egg and Tomato Skillet Casserole!

HI! It's been so long! A lot of things happened in 2014 and now I'm ready to shrug everything off and eat healthier this year.

A good start is this recipe, which we made today for Sunday brunch. It's another one of my "this is all the stuff I've got in the fridge, what I can make out of it?" recipes. It turned out amazing and I even got to enjoy one of Ja's Old Bay rimmed Bloody Marys while I cooked.

Jasin makes the BEST bloodies!
 This casserole is extremely filling, low carb/keto, and (most important) yummy!

Spicy Egg and Tomato Skillet Casserole

(serves 6-8 normal people or 3-4 VERY hungry people)

  • 2 small onions
  • 3/4 cup cooked kale
  • 1/2 can Goya chipotle peppers in Adobo sauce *
  • 1 tablespoon Kerrygold salted butter
  • 1/2 cup sugar free tomato sauce
  • dried parsley to taste
  • dried oregano to taste
  • dried basil to taste
  • 6 large eggs
  • approximately 8-12 small thin slices of fresh mozzarella cheese (I think feta would work very well here too, but didn't have any today)

* NOTE: If you don't like spicy food, you can replace the chipotle peppers with about 1/3 cup of mild salsa or chopped tomatoes.

1.) Roughly chop the onions, kale and chipotle peppers. I used my Ninja appliance because I'm lazy.


2.) Melt the butter on the skillet on medium heat, making sure to coat the entire bottom of the pan.

3.) Being careful not to burn the butter, spread the vegetable mixture evenly on the skillet and cook until the onions became nearly transparent.


4.) Evenly spread the tomato sauce and spices on top of the vegetable mixture and let it saturate. Do NOT let this boil - keep on a level medium heat.


5.) Crack your eggs one at a time into a small measuring cup and pour each one carefully from the cup into the pan (this helps ensure the eggs are evenly distributed).

6.) Once the egg soaks in and the whites begin to lose transparency, arrange your slices of mozzarella around the eggs.


7.) Cover the casserole with a lid or some tinfoil and let cook for 5-10 minutes more - if you want yolky eggs, err on the shorter side. For completely set egg yolks you may need to let cook for a little longer than 10 minutes. We did about 12 minutes, as Ja likes his eggs hard. (...that's what she said?)

While the casserole cooked, I had time to fry up a few small slices of bacon as a side dish. 
AND DONE:


We really enjoyed this and it only took about 25 minutes to make on a leisurely Sunday afternoon. Added bonus - it made a LOT, but it's so good we'll probably end up eating more for dinner (and maybe for my lunch tomorrow) !

SO GOOD! 
Hope you like this! To your health and happiness in 2015!

Φιλάκια,
Alex

Monday, January 6, 2014

Sid Sisters: (Late) Holiday Edition

Hello! I hope everyone had a wonderful holiday season spent surrounded by family, friends, good food, and love! I'm sorry that us sisters have been kinda AWOL. We have been enjoying each other and other family for the holidays, as well as recuperating from some germs that have been going around. Although the holidays are over, I really wanted to share two of my favorite cookie recipes from Christmas time. One is a classic here in the States: chocolate chip cookies. I know there are so many chocolate chip cookie recipes out there, and I have tried so many, but these cookies are truly the BEST that I have ever had! Seriously, just try them for yourself! The second recipe is a tradition in Greek households. Kourabiedes are Greek butter-almond cookies that are always made around Christmas and New Year's Day. So without further ado...


Don't these photos look great? That's because I took them on my new DSLR camera that Hubster got me for Christmas! I love it!
Eleni's Perfect Chocolate Chip Cookies: 

  • 3/4 c. butter (I normally use salted butter, but they still taste great with unsalted)
  • 1 1/2 c. sugar 
  • 2 T. maple syrup 
  • 2 t. vanilla 
  • 2 eggs 
  • 2 c. flour 
  • 1 t. baking soda 
  • 1/2 t. salt 
  • 1/2 a bag-1 whole bag of semi-sweet chocolate chips (I use close to 3/4 a bag. I like these chocolatey!) 
  1. Preheat oven to 350 degrees Fahrenheit 
  2. In small saucepan, melt the butter on low heat until butter is frothy. Take pan off heat and set aside to cool butter to about room temperature. *Edit: I've tried this recipe at "about" room temperature and get some mixed results within the batch. Usually the first round comes out a littler flatter than the rest, which are perfect. I have now made two batches perfectly by waiting for the melted butter to cool completely to room temp, including the outside of the saucepan reaching room temp.
  3. In large bowl, combine cooled, melted butter, sugar, maple syrup, vanilla, and eggs. Mix until well combined. 
  4. In medium bowl, combine flour, baking soda, and salt. Slowly add dry mixture to wet mixture and stir until flour is fully incorporated. Add chocolate chips and stir until chips are evenly distributed. *Edit: after this step, put dough into fridge for 5-6 minutes. I put the dough in, clean up my ingredients, wipe the counter, set up the cookie sheets and wire racks, then take the dough out and begin to form the cookies.
  5. With a small spoon, scoop dough into hand. Form a ball and place onto ungreased cookie sheet. Repeat this step until dough is gone. 
  6. Bake for 8-10 minutes, until bottoms of cookies are slightly golden brown. In my oven, 9 minutes is perfect. 
  7. Remove pan, let cool on counter for 2 minutes, then transfer to wire rack to finish cooling. 
This recipe makes 3 dozen cookies. They are sweet, buttery, soft, chocolatey, and delicious! I put them into an airtight container and they hold for up to a week, not that they EVER last that long. 

Ok. Onto Greek Christmas cookies! 


 Bad me eating the cookies before they are coated. Oops! But they are too hard to resist!

Sidiropoulos Family Kourabiedies Recipe: 
  • 2 1/4 c. butter, softened 
  • 1 c. powdered sugar 
  • 1 1/2 t. vanilla 
  • 1/2 c. almonds, chopped (you can used raw or roasted, just make sure they are not salted. I personally prefer raw. I also chop these in my bullet. Makes the process much faster.) 
  • 4 c. flour 
  • More powdered sugar for coating 
  1. Preheat oven to 350 degrees Fahrenheit. 
  2. In large bowl, beat butter on medium speed until fluffy, about 5 minutes. I use my hand mixer, but obviously a standing mixer works great, too. 
  3. Slowly add 1 c. powdered sugar and mix until thoroughly combined. Add vanilla and almonds and mix until combined. 
  4. Slowly add flour and mix until dough is no longer sticky. I stop halfway through this process and use a rubber spatula or spoon to do the rest. You might also need an extra pinch of flour to ensure your dough is not sticky. 
  5. Use a small spoon to scoop dough into hands. Form a ball, then press in one side of the ball to form a crescent shape. Place crescent on ungreased cookie sheet. Repeat this step until dough is gone. 


  6. Bake for 18-22 minutes. Bottoms of cookies should be a golden brown, but tops should just have a hint of gold. 
  7. Allow cookies to fully cool. Take each cookie and toss in a small bowl of powdered sugar until fully coated. 
These cookies are soft, light, and buttery. They literally just melt in your mouth. If your kourabiedes come out dry or a little hard, cook the next batch 1-2 minutes less. Also, this recipe makes a slightly ridiculous amount of cookies. But in our culture, you make a batch to last until New Year's. It is also a great cookie to share, so I gave some out as gifts as well and had to make another batch.

I hope you enjoy these two Christmas traditions from our family. Now to finish of this holiday themed post, I want to share a few pictures from our Christmas celebrations!  


 Christina was in town! We got her to ourselves for a few days before we all went to Παππου's house a few days before Christmas


I think we all, T-Rex and Hubster included, got spoiled this holiday! I hope you did, too! Until next time. 

Φιλάκια, 
Eleni

Monday, December 2, 2013

Keto Shepherd's Pie Casserole

Continuing our long-running penchant for ground beef and cauliflower: I whipped this up on Wednesday night. This is a filling and delicious Winter comfort food while being healthy, keto, and very low carb. Also, you get some nice Greek-style tastes here from the olive oil melted garlic, onion and peppers!

Keto Shepherd's Pie Casserole
  • 1 1/2 lbs. ground beef
  • 2 green peppers
  • 2 yellow onions
  • 4 cloves garlic
  • 1 large head of cauliflower
  • 4 tablespoons unsalted butter
  • 2 tablespoons extra virgin olive oil
  • salt, pepper, cayenne pepper to taste
  • cheddar cheese

1.) Finely chop peppers, onions, and garlic. Sauté salted vegetables on medium high heat in olive oil until onions and garlic are "melted" and translucent.

2.) While veggies are cooking, remove outer leaves and stem of cauliflower. Roughly chop up the cauliflower. Boil chopped cauliflower in salted water. Make sure the boiled cauliflower is still firm and not mushy -- you want your faux-tato casserole topping to be creamy, not watery. Drain cauliflower.

3.) Once vegetables are cooked and melted, add ground beef and salt and pepper to taste. Brown meat in vegetable mixture.

3.) Add salt, butter, and pepper to taste to your boiled, drained cauliflower. Then mix all in food processor or blender. (I used my trusty Ninja!) Set faux-tato mash aside.

4.) Once meat mixture is cooked, layer meat evenly into a casserole pan.


5.) Evenly spread your faux-tatoes on top of the meat mixture.
 

Pro Tip: A flexible spatula is the best way to get a nice and even layer here. It's useful for lots of things, really, including icing baked goods. We have a great set of silicone spatulas in three different sizes. Bonus when using silicone spatulas: they don't melt at high heat!


6.) Grate cheddar cheese and sprinkle on top of the casserole. I did this because cauliflower does not brown the way potatoes do in a traditional Shepherd's pie -- cauliflower lacks the starch to do so. The melted cheese on top basically completes the "look" of the pie. It's also delicious! I also lightly sprinkled on some cayenne for the same reasons (and you know how much I love cayenne!)


7.) Bake casserole in oven for 25 minutes at 375 degrees. Keep an eye out, though...if the sides start bubbling over, take it out ASAP!

8.) Admire your pretty pie.


9.) EAT!

Pro Tip #2: Wait about 5-10 minutes to let this cool down and use your large silicone spatula to cut squares and serve (as you can see from the above picture, I was in a rush and hungry and didn't take my own advice at first...). This casserole really stays together and looks nice. It's also very easily reheatable!

I hope you enjoy this recipe as much as Bear and I did! Let us know what you think in the comments!

-Alex

Wednesday, November 6, 2013

Halloween Highlights!

The older I get, the less I go out on holidays. Mostly for money reasons, but I also firmly believe that Halloween is one of the biggest "amateur nights" out there, especially in New York City. Being smushed into costumed, drunken revelers and paying $12 for a cocktail is not my idea of a good time.

So, on holidays like this, my husband and I have to make our own fun. Bear is an artist and he obsesses over teeth and skulls in his work. So, as a Halloween treat, I bought us a 4D skull puzzle. I figured we'd assemble it together and then Bear could use it as a model for his art. 


But before we could get to the main event, Bear surprised me with a pumpkin! While I was at work, he went on a pumpkin search to every grocery store in the neighborhood, to no avail. He was even told by a shopkeeper that "There are no pumpkins in the 'hood!" However, he spied a pumpkin in a display window on his way back to our apartment. Ten minutes of negotiation and five dollars later, he was the proud owner of a lopsided, weirdly shaped pumpkin!

When I got home from work, we popped open a bottle of wine and got to work on Jack's lobotomy. I suggested we use the pumpkin's weird shape to our advantage and "Drunk Jack" was born!

He's "tipsy."

We decided to use all of Jack's parts wisely and made roasted pumpkin seeds and Crustless Keto Pumpkin Pie from our drunken friend's innards.

Drunk Jack's Roasted Pumpkin Seeds
  1. Clean freshly scooped out pumpkin seeds in clear, cold water and pull stray pumpkin strands off of the seeds.
  2. Lightly grease a glass casserole pan with unsalted butter.
  3. Coat wet seeds in a mixture of salt, Old Bay seasoning, and garlic powder to taste.
  4. Roast in oven at 350 degrees Fahrenheit for 15-20 minutes or until nicely browned.

Breaking Bad-esque upshot!
 
These seeds smelled delightful, and the two I popped in my mouth were tasty...but I forgot to turn off the stove and the rest of the seeds burned to a crisp :-(

The reason for my fatal pumpkin seed error (other than my wine intake)? We were assembling the skull!

Spooky skull parts!
"Agent Dana Skully"

Disappointed by my lost pumpkins seeds but fortified by wine and our new skull friend, I decided to try my hand at making some pumpkin pie! 

I oven roasted Jack's innards in the same glass casserole pan until the pumpkin was soft to the touch (about 15 to 20 minutes).  I had to adapt this recipe after my first attempt at pie (following the linked recipe to the letter...) devolved into a soggy pile of pumpkin goo. 

Crustless Keto Pumpkin Pie
  • 2 cups fresh roasted pumpkin, pureed in blender
  • 3/4 cup heavy cream
  • 3 large eggs
  • 1 teaspoon cinnamon
  • 1/2 teaspoon cloves
  • 1 heaping tablespoon Sweet Leaf powdered stevia

  1. Mix all ingredients together in a large mixing bowl.
  2. Pour mixture evenly into greased glass pie pan (I used unsalted butter).
  3. Bake at 375 degrees for 45 minutes, or until top of pie is browned and a toothpick can be inserted and come out clean.

We ate half of it before I could get a picture!
Jack's insides gave us enough pumpkin to make 3 pies -- one sad, failed pie and two perfect, delightful, deliciously keto pies!  I love the taste of pumpkin, and the amount of stevia I used gave just a hint of sweetness.  If you prefer a sweeter tasting pie, I would say another tablespoon or two of stevia should be used.  Bear ate an entire half of one of the pies and topped it off with fresh whipped heavy cream with a bit of cinnamon. 

All in all, our Halloween was very fun. After all the arts, crafts, and baking, we lit Drunk Jack up and watched a couple episodes of "The X-Files" by jack'o'lantern light.

Drunk Jack has now been thrown away, but I think we will be doing some more pumpkin experiments soon.  Bear brought this home on Monday:

Kitty not included...
Hope you had a happy Halloween and kαλή όρεξη!!

-Alex
 
P.S.
 
Check out T-Rex's costume!
 
Q: How many licks will it take the T-Rex Owl to get to the center of her Tootsie Pop?
A: She'll have to learn to take the paper off first! ;-)